Note: this page contains text either copied directly from or modified from the KONAT Windows 10 Setup & Hardening Guide.
In spite of Windows 11 appearing to mandate the use of a privacy-violating Microsoft account, extensive telemetry, and forced placement of third-party spyware on your system, there are ways around that, which this guide will attempt top thoroughly explain.
In spite of Windows 11 being a relatively stable operating system, I would still advise using Windows 10 for the time being due to it lacking any requirement for TPM 2.0 (and having less bloatware out of the box), however, if you use a 12th generation or newer Intel CPU, due to Intel's "Performance-Hybrid Architecture" (also called "Efficiency Cores") I'd advise using Windows 11, seeing that on my i5-12400 system I've noticed a (likely anecdotal) improvement between Windows 11's and 10's performance for multitasking and gaming.
I should clarify, at this point you should have backed up any files you care about up to an external drive which won't be connected during this process. I am not liable for any damage caused to your system, files, or associated equipment due to this process.
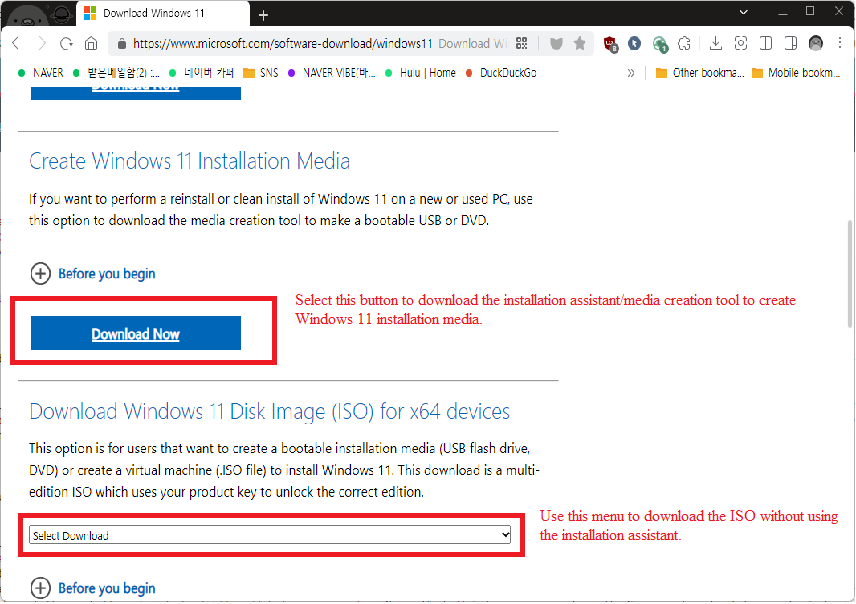
Microsoft gives you two options through their offical install page, to have the installation assistant create a bootable drive for you (or download the ISO image from Microsoft's servers and save it on your hard drive) or to download the ISO image directly from their site. Either works, and if you wish to not have the installation assistant create a bootable drive for you, tools such as Universal USB Installer (UUI) and RUFUS exist for creating a bootable USB drive.
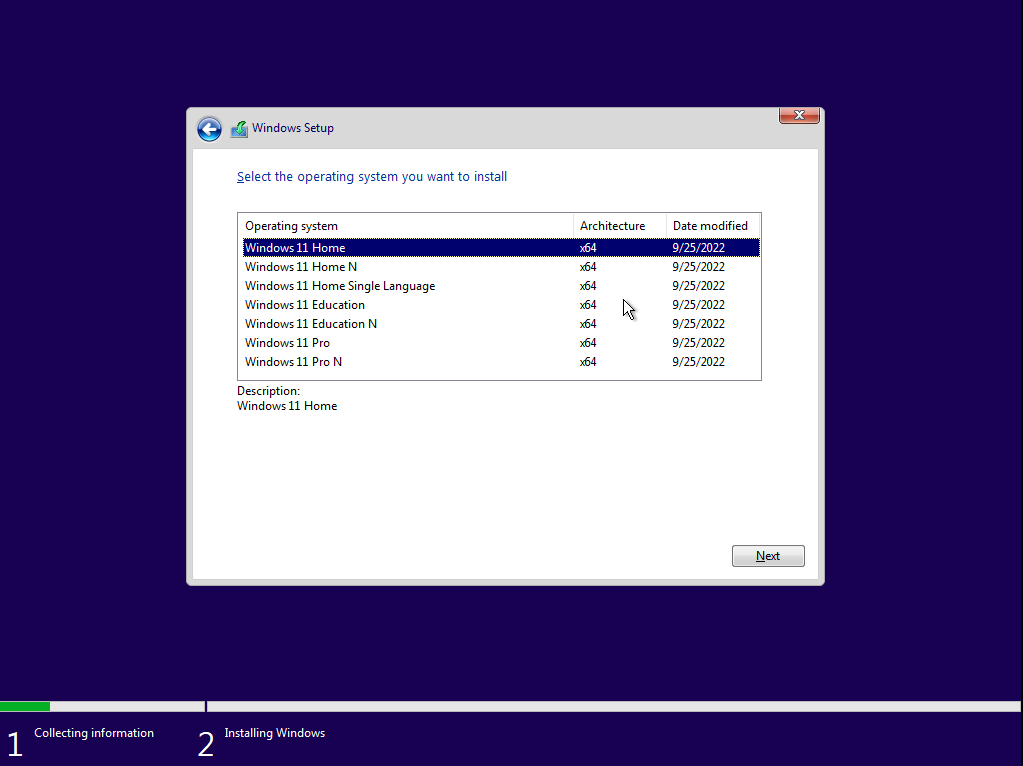
If your system shipped with Windows 10, 8, or 8.1, the installer will likely detect the edition that correlates with your license key and simply install that version, however, if it didn't, you can either enter a key for Windows 7 or newer, or select an edition from the list. This guide was created using Windows 11 Home, and as such, may not account for any differences in the Professional or Enterprise editions.
At this point, continue installation as normal (if you're unfamiliar with this process, a more in-depth guide to installing Windows is provided in the Windows 10 guide) until you reach the out-of-box-experience's (OOBE) account setup screen.
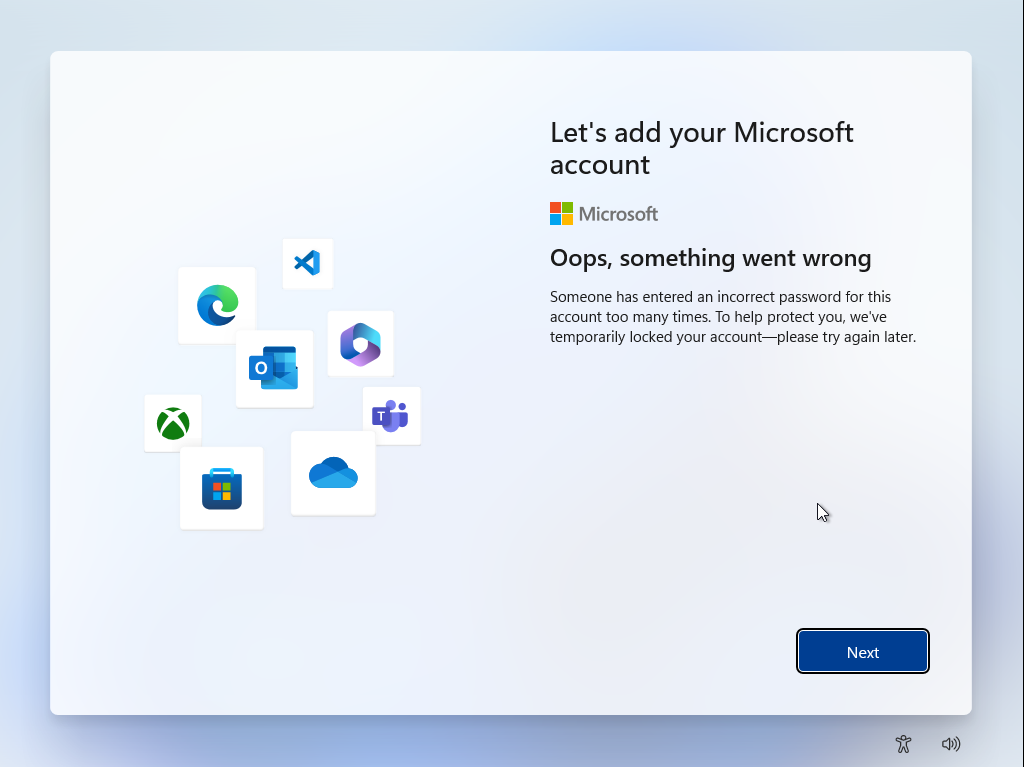
At the account screen, it may appear that Microsoft is forcing you to use a Microsoft account in order to use Windows 11, however there are two workarounds: the first of which, and simplest is to enter 'a@a.com' for the account and then enter any password, the installer will then let you use a local account. Sadly, the other "workaround" (bringing up the command prompt by pressing SHIFT and F10, then typing ipconfig /release) appears not to work, at least in my case.
If the known working and reliable (a@a.com) workaround worked, you should see the following error; just press 'Next' to proceed onward to creating a local account.
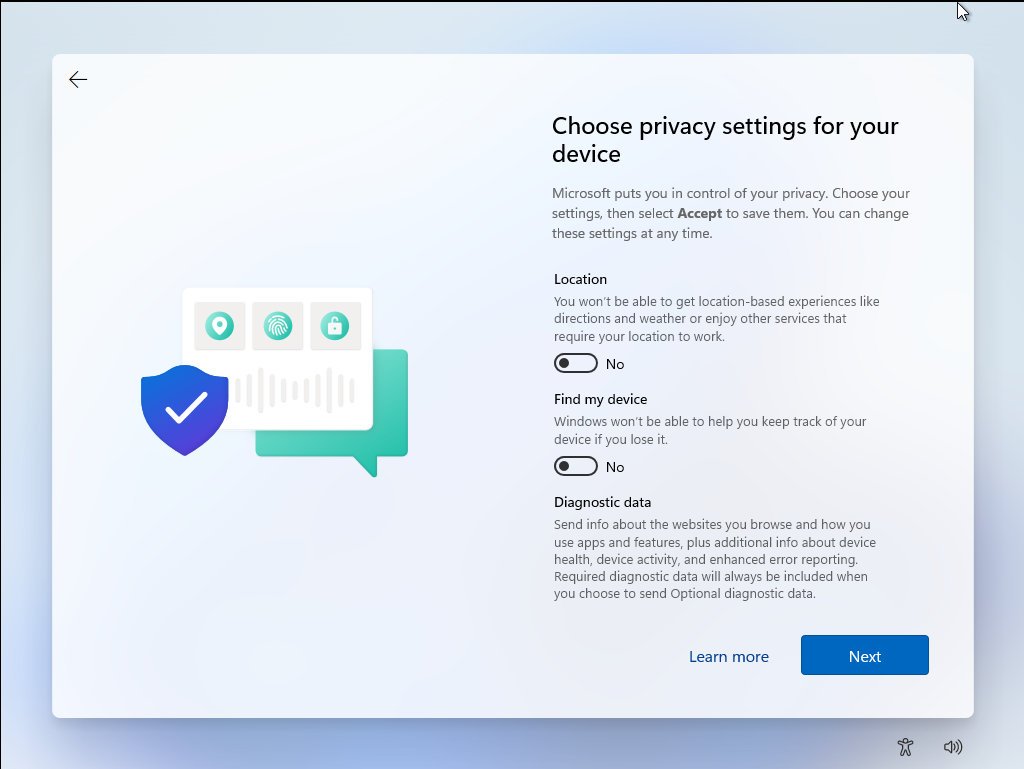
On the privacy settings screen, it is advised to change all of the switches to 'off.'
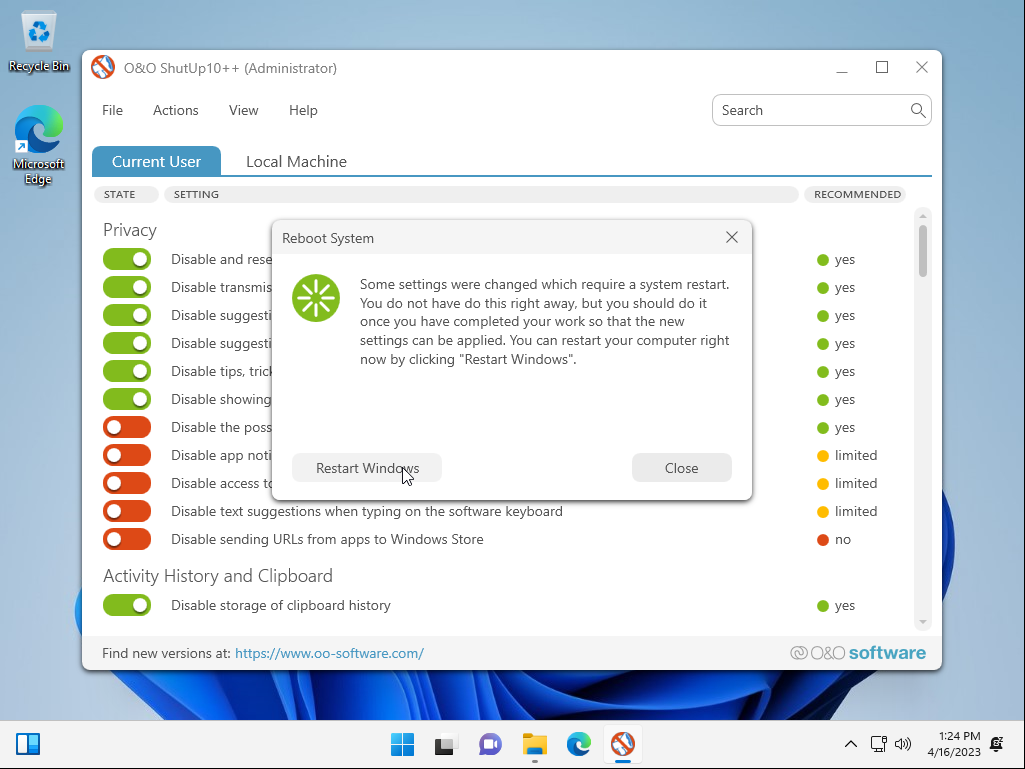
Once you're at the desktop, I would recommend running OOSU 10 to immediately block telemetry. When prompted, restart the system.
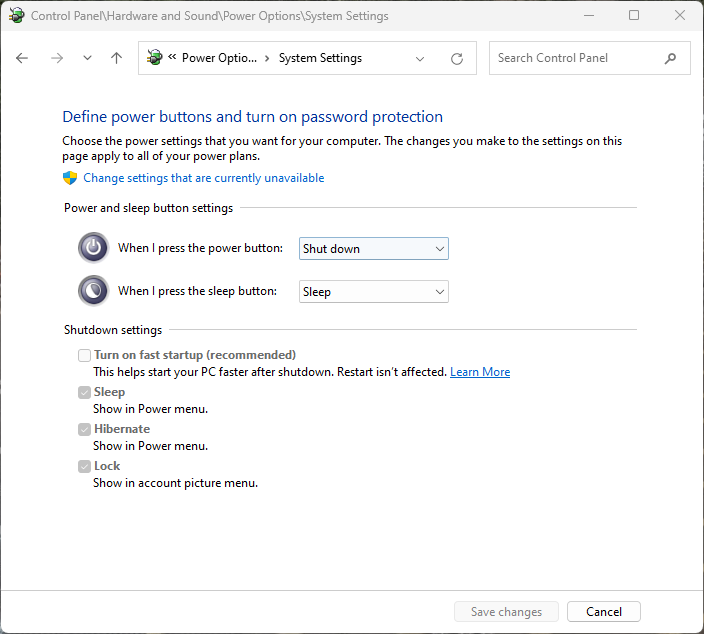
After restarting, open the Control Panel, type 'power' into the search box, and select 'Change what the power buttons do.' Once in that menu, click the option to change settings that are unavailible, and uncheck 'turn on fast startup' in order to prevent your system from entering hibernation mode when you actually intend to power it off; then click 'save changes.'
At this point, you can remove any software you don't want on the system, install software you want, and use the system as-normal, since it has been configured.
Copyright 2023, Econobox_ (d.b.a konat.neocities.org)